 Building your first PC can be a rewarding experience, offering a deeper understanding of how computers work and allowing you to customize a machine that perfectly fits your needs. Whether you’re a gamer, a creator, or someone who just loves technology, building a PC can be both fun and educational. Here’s a comprehensive step-by-step guide to help you through the process.
HINT: Watch Youtube videos on any section you are not clear about BEFORE you begin. Also, watch some “complete build” videos similar to the one you’re going to attempt.
Step 1: Planning and Choosing Your Components
Determine Your Needs:
Gaming: High-performance CPU, GPU, ample RAM, and efficient cooling.
Content Creation: Powerful CPU, high RAM, fast storage.
General Use: Moderate specs, balanced performance, and affordability.
Select Your Components:
HINT: GO TO PCPARTPICKER.COM AND USE THIS WEBSITE TO CHECK COMPATIBILITY. You can enter your components and the tool will check each component to make sure it is compatible with the other parts. DO THIS BEFORE YOU ORDER PARTS.
CPU (Central Processing Unit): The brain of your PC. Popular choices include Intel Core i5/i7/i9 or AMD Ryzen 5/7/9.
GPU (Graphics Processing Unit): Essential for gaming and graphic-intensive tasks. Options include NVIDIA GeForce RTX series or AMD Radeon RX series.
Motherboard: Choose a motherboard compatible with your CPU and offering the features you need (Wi-Fi, USB ports, etc.).
RAM (Random Access Memory): At least 8GB for general use, 16GB for gaming, 32GB or more for high-end tasks.
Storage: SSD for fast boot times and quick load speeds, HDD for additional storage. NVMe SSDs are the fastest.
Power Supply Unit (PSU): Ensure it provides enough power for your components. Check for efficiency ratings (80 Plus Bronze, Silver, Gold, etc.).
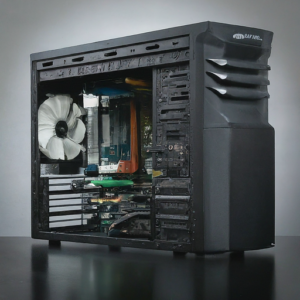
Case: Choose a case that fits your motherboard (ATX, Micro-ATX, Mini-ITX) and has good airflow.
Cooling: Stock coolers can suffice for basic builds; consider aftermarket air or liquid cooling for high-performance builds.
Peripherals: Monitor, keyboard, mouse, and any other accessories you might need.
Step 2: Preparing Your Workspace
Gather Tools:
Phillips head screwdriver
Anti-static wrist strap (optional but recommended)
Cable ties for managing cables
Organize Your Components:
Lay out all your components and tools on a clean, flat surface. Ensure you have enough space to work comfortably.
Step 3: Assembling the Motherboard
Install the CPU:
Open the CPU socket on the motherboard.
Align the CPU with the socket (look for the notches and the golden triangle).
Gently place the CPU into the socket and secure it.
Install RAM:
Open the RAM slots by pushing back the clips.
Align the RAM sticks with the slots and press down until they click into place.
Install M.2 SSD (if applicable):
Locate the M.2 slot on the motherboard.
Insert the SSD at a slight angle, then secure it with a screw.
Step 4: Preparing the Case
Install the Power Supply:
Place the PSU into the designated area of the case and secure it with screws.
Route the necessary cables to where they will be connected later.
Install Case Fans (if applicable):
Attach case fans to improve airflow and cooling. Follow the case’s instructions for placement.
Step 5: Installing the Motherboard
Install the I/O Shield:
Place the I/O shield in the back of the case, making sure it’s aligned correctly.
Mount the Motherboard:
Carefully place the motherboard into the case, aligning it with the standoffs.
Secure the motherboard with screws, ensuring it’s firmly in place.
Step 6: Connecting Components
Connect the PSU to the Motherboard:
Attach the 24-pin ATX power cable and the 8-pin CPU power cable.
Install and Connect Storage Drives:
Mount SSDs or HDDs in their respective bays.
Connect SATA cables from the drives to the motherboard and power cables from the PSU.
Install the GPU:
Insert the GPU into the PCIe slot and secure it with screws.
Connect the necessary power cables from the PSU to the GPU.
Step 7: Final Steps
Connect Front Panel Connectors:
Attach the case’s power button, reset button, USB ports, and audio jacks to the motherboard.
Cable Management:
Use cable ties to organize and secure cables for better airflow and aesthetics.
Final Check:
Ensure all components are securely connected and nothing is loose.
Double-check power connections and ensure the CPU cooler is properly seated.
Step 8: Powering On and Installing the OS
Initial Boot:
Connect your monitor, keyboard, and mouse.
Power on the PC and enter the BIOS by pressing the designated key (usually DEL or F2).
BIOS Setup:
Ensure all components are recognized.
Set the boot priority to your installation media (USB drive or DVD).
Installing the Operating System:
Insert your OS installation media and follow the on-screen instructions to install Windows, Linux, or another OS.
Install necessary drivers for your motherboard, GPU, and other components.
Conclusion
Building your first PC is a satisfying project that offers both practical skills and a deeper appreciation for how computers work. By following this guide, you’ll have a personalized machine tailored to your needs. If you need assistance or run into any issues, don’t hesitate to reach out to On-Site Louisville Computer Repair Co. for professional PC building help. Happy building!

Unmasking Facebook: A Breeding Ground for Fraud
 In the digital age, social media has become an integral part of our lives, with Facebook leading the charge. Launched in 2004, Facebook transformed the way we communicate, share, and connect with people worldwide. However, as its popularity has soared, so too has its darker side. Today, Facebook is plagued by fraud, turning what was once a digital utopia into a cesspool of deceit and manipulation.
The Magnitude of the Problem
Facebook’s massive user base—nearly 3 billion monthly active users—makes it an attractive target for fraudsters. The platform’s sheer scale and the speed at which information spreads contribute to an environment ripe for exploitation. From fake accounts and fraudulent advertisements to scams and misinformation, Facebook is a breeding ground for digital deceit.
Fake Accounts: The Root of the Problem
One of the most pervasive issues on Facebook is the prevalence of fake accounts. These accounts are often created with malicious intent, such as spreading misinformation, engaging in identity theft, or orchestrating scams. According to a 2023 report by Facebook’s parent company, Meta, there were nearly 5% of monthly active accounts that were fake or duplicate, translating to millions of fraudulent profiles.
These fake accounts can be used for a variety of nefarious purposes. Cybercriminals use them to launch phishing attacks, steal personal information, and spread malware. Additionally, fake accounts are often involved in social engineering schemes, where fraudsters manipulate victims into divulging sensitive information or transferring money.
Fraudulent Advertisements: A Growing Concern
Another major issue plaguing Facebook is the proliferation of fraudulent advertisements. Scammers create ads that mimic legitimate businesses to trick users into purchasing counterfeit goods, subscribing to fake services, or clicking on malicious links. Despite Facebook’s efforts to weed out these deceptive ads, many still slip through the cracks, resulting in financial losses and eroding user trust.
In one notable case, a study by the cybersecurity firm Ghostery found that fraudulent ads on Facebook led to millions of dollars in losses for unsuspecting users. These ads often promote too-good-to-be-true deals or miraculous health products, preying on the gullible and desperate.
Scams: From Romance to Financial Frauds
Facebook is also a hotbed for various types of scams, including romance scams, lottery scams, and investment frauds. Romance scams, in particular, have seen a dramatic rise, with scammers creating fake profiles to exploit vulnerable individuals looking for love. They build trust over time and eventually ask for money, often leaving their victims emotionally and financially devastated.
Investment frauds are another significant issue. Fraudsters use Facebook to promote fake investment opportunities, promising high returns with little risk. These schemes often target inexperienced investors, convincing them to part with their hard-earned money.
Facebook Marketplace Scams
Facebook Marketplace, a feature designed to facilitate buying and selling within local communities, has also become a hotspot for scams. Fraudsters use fake profiles to post attractive listings at unbeatable prices, luring in unsuspecting buyers. Once the buyer shows interest, the scammer often insists on upfront payment or deposits, only to disappear once the money is transferred. Conversely, sellers can also fall victim to scams when fake buyers send counterfeit checks or fraudulent payment confirmations. The anonymity and ease of communication on Facebook Marketplace make it an appealing venue for these types of fraud, further contributing to the platform’s overall problem with deceit and manipulation.
Misinformation and Its Consequences
In addition to direct fraud, Facebook is a powerful vector for misinformation. False information spreads like wildfire on the platform, influencing public opinion and sometimes leading to real-world harm. Whether it’s health misinformation, political propaganda, or conspiracy theories, the impact of fake news on Facebook cannot be underestimated.
During the COVID-19 pandemic, for example, Facebook was inundated with false information about the virus, vaccines, and treatments. This misinformation hindered public health efforts, contributing to vaccine hesitancy and undermining trust in medical authorities.
Facebook’s Response: Too Little, Too Late?
While Facebook has implemented measures to combat fraud and misinformation, many critics argue that these efforts are insufficient. The platform’s algorithms, designed to maximize engagement, often prioritize sensational content, inadvertently amplifying false information and deceptive ads.
Facebook has invested in artificial intelligence and human moderators to detect and remove fraudulent content, but the sheer volume of posts makes it a daunting task. Furthermore, the company’s business model, which relies heavily on targeted advertising, creates a conflict of interest, as stricter regulations on ads could impact revenue.
Conclusion: Navigating the Digital Minefield
As Facebook continues to grapple with fraud and misinformation, users must remain vigilant. It’s crucial to verify the authenticity of accounts and advertisements, be skeptical of too-good-to-be-true offers, and critically evaluate the information encountered on the platform. While Facebook may never be completely free of fraud, informed users can better navigate its digital minefield, reducing the risk of falling victim to scams and deception.
In the end, the responsibility lies with both Facebook and its users. The platform must strengthen its efforts to detect and eliminate fraudulent content, while users must exercise caution and critical thinking. Only then can we hope to reclaim Facebook from the clutches of fraud and restore its potential as a force for good in the digital world.
Demystifying 5G vs. 5 Mbps vs. 5 GHz Wi-Fi Bands: Understanding Modern Connectivity
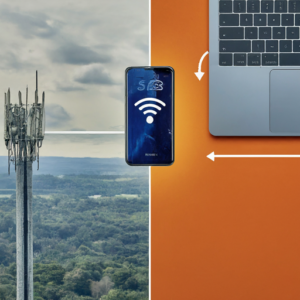 In the rapidly evolving world of connectivity, terms like 5G, Mbps, and Wi-Fi bands (2.4 GHz, 5 GHz, and Wi-Fi 6) are often misunderstood or confused. This guide aims to clarify these concepts and help you make informed decisions about your internet setup and usage.
5G: The Next Generation of Mobile Networks
What is 5G? 5G stands for the fifth generation of mobile networks. It promises significantly faster speeds, lower latency, and greater capacity compared to previous generations (4G, 3G, etc.).
Key Features of 5G:
1. Speed: 5G can provide download speeds up to 10 Gbps (gigabits per second), which is around 100 times faster than 4G.
2. Latency: 5G offers ultra-low latency, around 1 millisecond (ms), making real-time applications like online gaming and remote surgeries feasible.
3. Capacity: With a higher capacity, 5G can support more devices per square kilometer, improving connectivity in densely populated areas.
Common Misconception:
• 5G is often confused with Wi-Fi technologies, but it is a mobile network standard designed for cellular devices, whereas Wi-Fi is used for local area networking within homes and businesses.
Mbps: Measuring Internet Speed
What is Mbps? Mbps stands for megabits per second and is a unit of measurement for data transfer speed. It indicates how many megabits of data can be transmitted in one second.
Understanding Mbps:
• Higher Mbps = Faster Internet: More Mbps means faster download and upload speeds. For example, 1000 Mbps (1 Gbps) means your internet can theoretically download 1 gigabit of data per second.
• Application Needs: Different applications require different speeds. Streaming HD video might require 5-10 Mbps, while 4K streaming or gaming might need 25-50 Mbps.
Common Misconception:
• Mbps is often confused with MBps (megabytes per second). 1 byte = 8 bits, so 1 MBps = 8 Mbps.
Wi-Fi Bands: 2.4 GHz vs. 5 GHz vs. Wi-Fi 6
Wi-Fi Bands: Wi-Fi routers operate on different frequency bands, primarily 2.4 GHz and 5 GHz. Each band has its own characteristics:
1. 2.4 GHz:
• Range: Better range and penetration through walls and obstacles.
• Speed: Generally slower speeds compared to 5 GHz.
• Interference: More prone to interference as many devices (like microwaves and cordless phones) use this frequency.
2. 5 GHz:
• Range: Shorter range and less effective at penetrating walls.
• Speed: Higher speeds compared to 2.4 GHz.
• Interference: Less crowded, thus experiencing less interference and congestion.
Wi-Fi 6 (802.11ax): Wi-Fi 6 is the latest generation of Wi-Fi technology, offering significant improvements over previous standards (Wi-Fi 5/802.11ac):
• Speed: Higher maximum speeds, up to 9.6 Gbps.
• Efficiency: Better performance in crowded environments due to more efficient data handling.
• Latency: Lower latency, improving real-time applications.
• Battery Life: Improved battery life for connected devices via Target Wake Time (TWT).
Common Misconception:
• Wi-Fi 6 is often thought to be a frequency band like 2.4 GHz or 5 GHz, but it is actually a standard that can operate on both bands, enhancing overall performance and efficiency.
Practical Applications: Choosing the Right Setup
1. Home Users:
• Basic Use (Browsing, Streaming HD Video): A 2.4 GHz Wi-Fi network with a speed of 25-50 Mbps should suffice.
• Advanced Use (4K Streaming, Gaming): A 5 GHz Wi-Fi network or Wi-Fi 6 router with speeds of 200-1000 Mbps is recommended for better performance and lower latency.
2. Office/Business Users:
• Multiple Users/Devices: A dual-band router (supporting both 2.4 GHz and 5 GHz) or Wi-Fi 6 router to manage multiple devices effectively.
• High-Speed Needs: Internet plans offering 500-1000 Mbps to support data-intensive tasks and ensure seamless connectivity.
3. Mobile Users:
• 5G Networks: For those requiring high-speed internet on the go, especially in urban areas where 5G coverage is more prevalent. Ensure your device supports 5G.
Conclusion
Understanding the differences between 5G, Mbps, and Wi-Fi bands (2.4 GHz, 5 GHz, and Wi-Fi 6) can significantly impact your internet experience. By choosing the right combination of mobile networks, internet speeds, and Wi-Fi technologies, you can optimize connectivity to meet your specific needs, whether for home use, business, or mobile connectivity. This knowledge empowers you to make informed decisions, ensuring you get the most out of your internet service and devices.
How to Reformat and Reinstall Windows: A Step-by-Step Guide
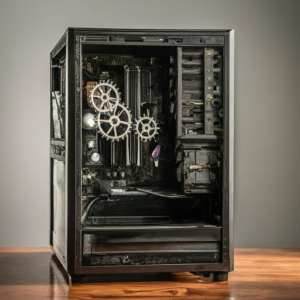
Reformatting and reinstalling Windows can breathe new life into your computer, resolving persistent issues and improving performance. Whether your system is plagued by malware, running slowly, or you simply want a fresh start, this guide will walk you through the process step by step.
Before You Begin: Backup Your Data
Before starting the reformatting process, it’s crucial to back up your important files and data. This includes documents, photos, music, and any other files you don’t want to lose. You can use an external hard drive, cloud storage, or a USB flash drive for your backups.
Step 1: Create a Windows Installation Media
To reinstall Windows, you’ll need a bootable installation media. You can create this using a USB flash drive or a DVD.
Download the Windows Media Creation Tool: Go to the Microsoft website and download the Windows Media Creation Tool.
Run the Tool: Open the tool and select “Create installation media for another PC.”
Choose Language, Edition, and Architecture: Select your preferences. For most users, the default options are appropriate.
Select Media: Choose “USB flash drive” or “ISO file” (if you want to burn it to a DVD later).
Create the Media: Follow the prompts to create the installation media. If you chose a USB flash drive, ensure it’s inserted; if an ISO file, you’ll need to burn it to a DVD afterward.
Step 2: Reformat Your Hard Drive
Now that you have your installation media, it’s time to reformat your hard drive.
Insert the Installation Media: Insert the USB flash drive or DVD into your computer.
Restart Your Computer: Boot from the installation media. You might need to change the boot order in your BIOS/UEFI settings to do this. Usually, this involves pressing a key like F2, F12, Delete, or Esc during startup.
Start Windows Setup: Once you boot from the installation media, you’ll see the Windows Setup screen.
Choose Your Preferences: Select your language, time, and keyboard preferences, then click “Next.”
Install Now: Click “Install now” to start the installation process.
Enter Product Key: Enter your Windows product key. If your computer came with Windows pre-installed, the key might be embedded in the BIOS/UEFI, and you can skip this step.
License Terms: Accept the license terms and click “Next.”
Custom Installation: Choose “Custom: Install Windows only (advanced).”
Delete Partitions: You’ll see a list of your hard drive partitions. Select each partition and click “Delete” to remove them. Be careful to delete the correct partitions, as this will erase all data on them.
Create New Partition: Select the unallocated space and click “New” to create a new partition. Click “Apply” to confirm.
Step 3: Install Windows
Select Partition: Choose the partition where you want to install Windows and click “Next.”
Install Windows: Windows will start copying files and installing. This process can take some time, and your computer may restart several times.
Setup Windows: After installation, you’ll need to go through the initial setup process. This includes choosing your region, keyboard layout, and connecting to a network.
Sign In: Sign in with your Microsoft account, or create a local account if you prefer.
Finish Setup: Follow the remaining prompts to complete the setup process.
Step 4: Install Drivers and Updates
Once Windows is installed, you’ll need to install your device drivers and run Windows Update.
Windows Update: Go to Settings > Update & Security > Windows Update and check for updates. Install all available updates.
Device Drivers: Visit your computer manufacturer’s website to download and install the latest drivers for your hardware. This includes drivers for your graphics card, sound card, network adapter, and other peripherals.
Conclusion
Reformatting and reinstalling Windows can seem daunting, but following these steps will help you achieve a clean and fresh installation. Always remember to back up your data before starting, and take your time to ensure each step is completed correctly. If you encounter any issues or need professional assistance, On-Site Louisville Computer Repair Co. is here to help. Contact me the owner Chris for expert support and services.
Understanding Laptop Screen Size and Resolution: A Comprehensive Guide
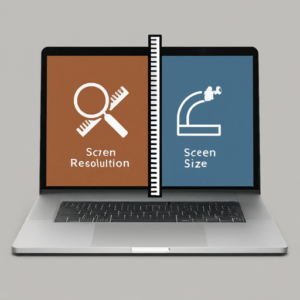
Screen Size
Screen size on laptops refers to the diagonal measurement of the display, typically given in inches. This measurement spans from one corner of the screen to the opposite corner (excluding the bezel). Common laptop screen sizes include:
11-13 inches: Ultra-portable laptops, ideal for travel and light use.
14-16 inches: A balance between portability and screen real estate, suitable for most users.
17 inches and above: Larger screens, often found in gaming laptops or those used for multimedia and design, offering more workspace but less portability.
Resolution
Resolution refers to the number of pixels displayed on the screen. It’s usually represented as width × height (in pixels). Higher resolutions mean more pixels, which translates to sharper and clearer images.
Common resolutions include:
HD (1366 × 768): Basic resolution, sufficient for everyday tasks like web browsing and document editing.
Full HD (1920 × 1080): Standard for many modern laptops, offering good clarity and detail for most uses, including video streaming and gaming.
Quad HD (2560 × 1440): Higher clarity, often found in premium laptops, suitable for detailed work like photo and video editing.
4K UHD (3840 × 2160): Very high resolution, providing extremely sharp images, used in high-end laptops for professional graphics work and immersive gaming.
Relationship Between Screen Size and Resolution
The combination of screen size and resolution affects the display quality and usability:
Pixel Density: Measured in pixels per inch (PPI), it indicates how many pixels are packed into a given area. Higher pixel density means sharper images. For example, a 13-inch laptop with Full HD resolution will have a higher pixel density (and thus sharper image) than a 17-inch laptop with the same resolution.
Scaling: On high-resolution screens, elements like text and icons may appear too small. Operating systems use scaling to adjust these elements to a comfortable size, maintaining clarity while ensuring usability.
Aspect Ratio: The proportion of the screen’s width to its height. Common ratios are 16:9 (widescreen, typical for most laptops) and 3:2 (found in some productivity-focused laptops, offering more vertical space).
Practical Considerations
When choosing a laptop:
Purpose: Consider what you’ll use the laptop for. For general use, Full HD on a 14-15 inch screen is typically sufficient. For professional design work, a higher resolution on a larger screen might be necessary.
Battery Life: Higher resolution screens consume more power. If battery life is a priority, a lower resolution might be beneficial.
Budget: Higher resolutions generally come at a higher cost. Balance your need for screen quality with your budget.
Understanding these aspects helps you choose a laptop that best fits your needs, ensuring you get the right balance of screen size, resolution, and overall usability.

RSS Feed
