 As online scams become increasingly sophisticated, seniors are often targeted due to their perceived vulnerability. At On-Site Louisville Computer Repair Co., we understand the distress and confusion that can follow such incidents. Our first recommendation for any senior who suspects they have been scammed is to call a reputable local computer service company that offers house calls or on-site service, such as our own. You can reach us at (502) 963-3981 for immediate assistance in assessing and mitigating the damage.
In addition to seeking professional help, there are numerous resources and support systems available to assist seniors who have been targeted by online scams:
1. Local Law Enforcement
If you believe you have been scammed, it’s crucial to report the incident to your local police department. They can guide you through the process of documenting the scam and may be able to assist in recovering lost funds.
Louisville Metro Police Department
Non-Emergency Number: (502) 574-7111
Website: Louisville Metro PD
2. Federal Trade Commission (FTC)
The FTC collects reports of fraud and can provide information on how to protect yourself in the future. They also work to track and shut down scam operations.
Federal Trade Commission
Phone: 1-877-FTC-HELP (1-877-382-4357)
Website: ReportFraud.ftc.gov
3. AARP Fraud Watch Network
AARP offers extensive resources for seniors, including a helpline, educational materials, and the opportunity to report scams. Their Fraud Watch Network provides up-to-date information on current scams and tips for avoiding them.
AARP Fraud Watch Network
Phone: 1-877-908-3360
Website: AARP Fraud Watch Network
4. National Elder Fraud Hotline
This hotline, operated by the Office for Victims of Crime, offers free assistance to seniors who have been affected by fraud. The hotline is staffed by professionals who can provide support and information on how to report and recover from scams.
National Elder Fraud Hotline
Phone: 1-833-FRAUD-11 (1-833-372-8311)
Website: Elder Fraud Hotline
5. Identity Theft Resource Center (ITRC)
The ITRC provides free assistance to victims of identity theft, including seniors who have had their personal information stolen. They offer advice on how to recover from identity theft and prevent future incidents.
Identity Theft Resource Center
Phone: 1-888-400-5530
Website: IDTheftCenter.org
6. Better Business Bureau (BBB)
The BBB can help you verify the legitimacy of a business or service provider, report scams, and find trustworthy companies. They offer a Scam Tracker tool to report and view local scam activity.
Better Business Bureau
Phone: (502) 583-6546 (Louisville Office)
Website: BBB Scam Tracker
7. Senior Medicare Patrol (SMP)
SMP programs help seniors protect themselves against Medicare fraud, errors, and abuse. They provide education and assistance in reporting fraudulent activities related to healthcare services.
Senior Medicare Patrol
Phone: 1-877-808-2468
Website: SMPResource.org
Steps to Take Immediately After Suspecting a Scam
1. Contact a Professional: Call a reputable local computer service company like On-Site Louisville Computer Repair Co. at (502) 963-3981 to assess the damage and secure your system.
2. Change Your Passwords: Immediately change the passwords for your email, banking, and other important accounts.
3. Monitor Financial Statements: Keep a close eye on your bank and credit card statements for any unauthorized transactions.
4. Report the Scam: Use the resources listed above to report the scam to the appropriate authorities.
5. Educate Yourself: Stay informed about the latest scams and learn how to protect yourself by visiting websites like the FTC and AARP Fraud Watch Network.
Remember, you are not alone. Many seniors face similar challenges, and there are numerous resources and professionals ready to help you navigate this difficult situation. Don’t hesitate to reach out for support and take proactive steps to protect yourself in the future.
 Purchasing a new laptop is a significant investment, and with the plethora of options available today, it can be overwhelming to make the right choice. At On-Site Louisville Computer Repair Co., we understand the nuances involved in choosing the perfect laptop that meets your needs. Here’s a detailed guide to help you navigate the essential factors to consider when buying a new laptop.
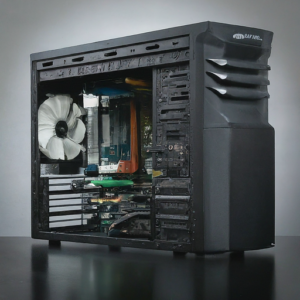
 In the digital age, social media has become an integral part of our lives, with Facebook leading the charge. Launched in 2004, Facebook transformed the way we communicate, share, and connect with people worldwide. However, as its popularity has soared, so too has its darker side. Today, Facebook is plagued by fraud, turning what was once a digital utopia into a cesspool of deceit and manipulation.
 In the rapidly evolving world of connectivity, terms like 5G, Mbps, and Wi-Fi bands (2.4 GHz, 5 GHz, and Wi-Fi 6) are often misunderstood or confused. This guide aims to clarify these concepts and help you make informed decisions about your internet setup and usage.

 Living in a vibrant city like Louisville means being on the go! Whether you’re a remote worker, a student catching up on studies, or just enjoying a coffee break, free Wi-Fi is a lifesaver. But before you dive into that public network, here’s a guide to Louisville’s top free Wi-Fi hotspots, along with some essential security tips to keep your data safe while you surf.
 Artificial Intelligence (AI) is revolutionizing various industries, and the realm of PC repairs is no exception. As AI technology continues to advance, its integration into PC repair processes promises to bring about significant changes, enhancing efficiency, accuracy, and overall customer satisfaction. In this blog post, we will explore the potential impact of AI on future PC repairs and what it means for both technicians and end-users.

