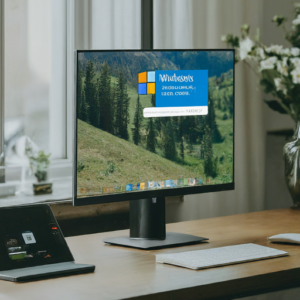
Microsoft’s Windows 11 has been making waves since its release, offering a sleek new design, enhanced security, and productivity features tailored to modern users. However, the big question on everyone’s mind is: do you need to buy a new PC to use Windows 11? While some users may find their current machines up to the task, others might face the reality of upgrading. Let’s break it down.
Understanding Windows 11’s System Requirements
Before jumping to conclusions, it’s essential to understand what Windows 11 demands from your hardware. Key requirements include:
Processor: 1 GHz or faster with at least 2 cores on a compatible 64-bit processor or System on a Chip (SoC).
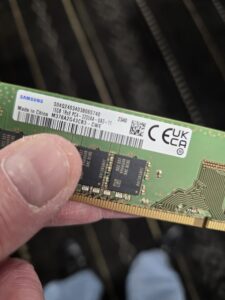
RAM: 4 GB or more.
Storage: 64 GB or more.
System Firmware: UEFI, Secure Boot capable.
TPM: Trusted Platform Module (TPM) version 2.0.
Graphics Card: DirectX 12 compatible with WDDM 2.0 driver.
Display: High-definition (720p) display greater than 9″ diagonally with 8 bits per color channel.
While many modern PCs meet these requirements, older systems, especially those lacking TPM 2.0 or Secure Boot, might not be compatible.
How to Check Your PC’s Compatibility
The easiest way to determine if your PC can run Windows 11 is by using Microsoft’s PC Health Check Tool. This free utility scans your system and provides a compatibility report. If your PC doesn’t meet the requirements, it will indicate which components fall short.
Upgrading Your Existing PC vs. Buying a New One
If your current PC doesn’t pass the compatibility test, you have two main options: upgrading certain components or purchasing a new machine. Here’s how to decide:
Option 1: Upgrade Your Existing PC
For Windows 11, the most critical factors are your processor, RAM, and storage. To meet the requirements, your PC must have an 8th generation Intel processor or equivalent AMD processor or newer. If your processor is older, upgrading is typically not practical, as it would require a new motherboard and potentially other components.
Additionally, ensure your PC has at least 8 GB of RAM and an SSD (Solid State Drive). While RAM upgrades are relatively straightforward, if your system lacks an SSD, switching from a traditional hard drive can dramatically improve performance. Without these hardware basics, upgrading your existing PC may not be worth the effort or cost.
Option 2: Buy a New PC
If your PC is several years old or doesn’t support critical features like TPM 2.0 or a modern processor, it might be time to invest in a new machine. While this can be a significant upfront expense, a modern PC offers:
Enhanced security features.
Better performance and energy efficiency.
Compatibility with the latest software and hardware.
Factors to Consider Before Buying
If you decide on a new PC, think about the following:
Purpose: Are you a casual user, gamer, or professional? Choose a machine that suits your needs.
Budget: There are options for every price range, from budget-friendly laptops to high-performance desktops.
Longevity: Investing in a slightly more powerful machine can ensure it stays relevant longer.
Staying on Windows 10: A Viable Option?
If your current PC can’t run Windows 11 and upgrading or replacing it isn’t feasible, you can stick with Windows 10—for now. Microsoft has committed to supporting Windows 10 with updates and security patches until October 14, 2025. This gives you time to plan your next steps without compromising security.
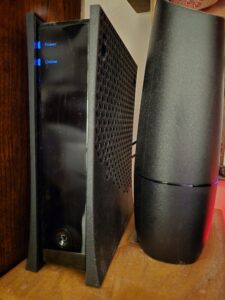 In today’s wireless world, it’s easy to overlook the advantages of a good old-fashioned wired Ethernet connection. While Wi-Fi is convenient, there are many situations where Ethernet reigns supreme. I know at my home I have 1000MPBS internet service through Spectrum. On the devices that I connect to wi-fi (laptop, phone, alarm, cameras, smart lights, etc.) I get an average speed of about 400 MBPS down. On my wired ethernet connect that number is about 950 MPBS. So . . .whether you’re working from home, gaming, streaming, or simply looking for the most reliable internet connection, Ethernet offers distinct benefits that can enhance your digital experience.
 In recent years, registry cleaners like CCleaner have gained popularity among users looking to “optimize” their PC’s performance. In my computer repair practice in Louisville, KY I see quite a few people every year with CCleaner and other registry cleaners on their computers. Some are even built into antivirus software such as Norton, McAfee, Kaspersky, etc. These tools promise to clean up your system’s registry by removing outdated or unnecessary entries, supposedly improving speed and efficiency. However, these claims are often exaggerated, and in many cases, using registry cleaners can cause more harm than good.

 Windows S-Mode is a streamlined version of Windows designed to enhance security and performance. However, it comes with limitations that might not be suitable for everyone. The main problem I see at my computer repair company in Louisville is that S-Mode blocks you from downloading any apps that are not Microsoft owned. Even Google Chrome! How absurd. Nevertheless, in this blog post, I’ll explain what Windows S-Mode is, its benefits and drawbacks, and how you can switch out of it.
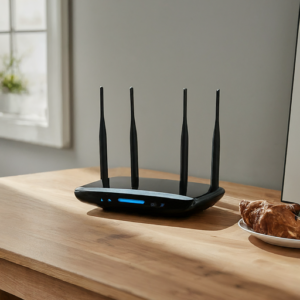 In the ever-evolving landscape of home and office networking, choosing the right Wi-Fi solution can be a daunting task. With the rise of mesh networks, the traditional router no longer stands as the sole option for providing wireless connectivity. But how do you decide which is the right fit for your needs? In this article, we’ll dive into the differences between mesh networks and traditional routers, helping you make an informed decision.
 In today’s digital age, protecting your personal information online is more important than ever. At On-Site Louisville Computer Repair Co., we understand the unique challenges you face when navigating the internet. Our goal is to empower you with the knowledge and tools needed to stay safe online. Here are some essential tips to protect your personal information.
 Purchasing a new laptop is a significant investment, and with the plethora of options available today, it can be overwhelming to make the right choice. At On-Site Louisville Computer Repair Co., we understand the nuances involved in choosing the perfect laptop that meets your needs. Here’s a detailed guide to help you navigate the essential factors to consider when buying a new laptop.