 Upgrading to Windows 11 is an exciting opportunity to experience the latest features and improvements from Microsoft. Microsoft will stop supporting Windows 10 on October 14, 2025.. Follow this comprehensive guide to upgrade your PC safely and successfully, complete with illustrations for each step.
Step 1: Check System Requirements
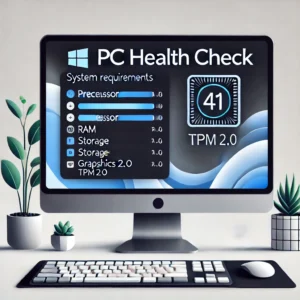
Before upgrading, ensure your PC meets the minimum requirements for Windows 11.
1. Processor: 1 GHz or faster and Intel Core 8th gen or newer processor or AMD equivalent.
2. RAM: 4 GB or more.
3. Storage: 64 GB or more available space.
4. Graphics Card: Compatible with DirectX 12 or later with a WDDM 2.0 driver.
5. TPM: Version 2.0 enabled.
To check your system compatibility:
• Use the PC Health Check tool from Microsoft: Download it here.
Pro Tip: If your computer does not have an Intel 8th gen processor and an SSD you need to replace your equipment.
Step 2: Back Up Your Data
Ensure your data is safe before proceeding with the upgrade.
1. External Drive Backup:
o Connect an external hard drive.
o Open File Explorer, select important files, and copy them to the external drive.
2. Cloud Backup:
o Use services like OneDrive or Google Drive to upload critical files.
Step 3: Download Windows 11
Visit Microsoft’s official website to download the upgrade files using the Microsoft Creator Tool. It’s easy to use you can put Windows 11 on a clean flash drive of 8GB or more.
1. Go to the Windows 11 download page.
2. Click Download Now for the Microsoft Creator Tool.
3. Run the Installation Assistant and follow the prompts.
Step 4: Perform a Clean Install
A clean install involves booting your PC from the USB drive and performing a fresh installation of Windows 11.
1. Insert the bootable USB drive into your PC.
2. Restart your PC and enter the boot menu (usually by pressing F12, F2, or Esc during startup; refer to your manufacturer’s guide).
3. Select the USB drive from the boot options.
4. When the Windows Setup screen appears:
o Select your language, time, and keyboard preferences, then click Next.
o Click Install Now.
5. On the “Activate Windows” screen, enter your product key or click “I don’t have a product key” to proceed (if you’re reinstalling).
6. Select Custom: Install Windows only (advanced).
7. Delete existing partitions:
o Select each partition and click Delete to remove them. Ensure you’ve backed up all important data before proceeding.
o Select the unallocated space and click Next to install Windows 11.
8. The installation process will begin. Your PC may restart multiple times; ensure it remains plugged in.
Step 5: Complete the Setup
Once the installation is complete:
1. Follow on-screen prompts to set up preferences like language, time zone, and privacy settings.
2. Sign in with your Microsoft account.
Step 6: Verify and Enjoy
After setup, ensure everything is running smoothly:
1. Check for updates:
o Go to Settings > Update & Security > Windows Update.
o Click Check for Updates to install the latest patches.
2. Explore new features like Snap Layouts, Widgets, and the redesigned Start menu.
Congratulations! You’ve successfully upgraded to Windows 11. If you encounter any difficulties, feel free to reach out to On-Site Louisville Computer Repair Company for expert assistance.


