 At my computer repair company in Louisville, KY lots of guys call me after their PC building experiment has failed. So, I wrote this guide for people so they can read it before they build their first computer. Building your first PC can be a rewarding experience, offering a deeper understanding of how computers work and allowing you to customize a machine that perfectly fits your needs. Whether you’re a gamer, a creator, or someone who just loves technology, building a PC can be both fun and educational. Here’s a comprehensive step-by-step guide to help you through the process.
HINT: Watch Youtube videos on any section you are not clear about BEFORE you begin. Also, watch some “complete build” videos similar to the one you’re going to attempt. I would say watch at least five videos before you even order your first part.
Step 1: Planning and Choosing Your Components
Determine Your Needs:
Gaming: High-performance CPU, GPU, ample RAM, and efficient cooling.
Content Creation: Powerful CPU, high RAM, fast storage.
General Use: Moderate specs, balanced performance, and affordability.
Select Your Components:
Hint: Go to pcpartpicker.com and use this website to check compatibility. You can enter your components and the tool will check each component to make sure it is compatible with the other parts. Do this before you order parts.
CPU (Central Processing Unit): The brain of your PC. Popular choices include Intel Core i5/i7/i9 or AMD Ryzen 5/7/9.
GPU (Graphics Processing Unit): Essential for gaming and graphic-intensive tasks. Options include NVIDIA GeForce RTX series or AMD Radeon RX series.
Motherboard: Choose a motherboard compatible with your CPU and offering the features you need (Wi-Fi, USB ports, etc.).
RAM (Random Access Memory): At least 8GB for general use, 16GB for gaming, 32GB or more for high-end tasks.
Storage: SSD for fast boot times and quick load speeds, HDD for additional storage. NVMe SSDs are the fastest.
Power Supply Unit (PSU): Ensure it provides enough power for your components. Check for efficiency ratings (80 Plus Bronze, Silver, Gold, etc.).
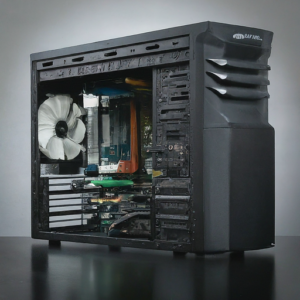
Case: Choose a case that fits your motherboard (ATX, Micro-ATX, Mini-ITX) and has good airflow.
Cooling: Stock coolers can suffice for basic builds; consider aftermarket air or liquid cooling for high-performance builds.
Peripherals: Monitor, keyboard, mouse, and any other accessories you might need.
Step 2: Preparing Your Workspace
Gather Tools:
Phillips head screwdriver
Anti-static wrist strap (optional but recommended)
Cable ties for managing cables
Organize Your Components:
Lay out all your components and tools on a clean, flat surface. Ensure you have enough space to work comfortably.
Step 3: Getting the Motherboard Ready
Install the CPU:
Open the CPU socket on the motherboard.
Align the CPU with the socket (look for the notches and the golden triangle).
Gently place the CPU into the socket and secure it.
Install RAM:
Open the RAM slots by pushing back the clips.
Align the RAM sticks with the slots and press down until they click into place.
Install M.2 SSD (if applicable):
Locate the M.2 slot on the motherboard.
Insert the SSD at a slight angle, then secure it with a screw.
Step 4: Preparing the Case
Install the Power Supply:
Place the PSU into the designated area of the case and secure it with screws.
Route the necessary cables to where they will be connected later.
Install Case Fans (if applicable):
Attach case fans to improve airflow and cooling. Follow the case’s instructions for placement.
Step 5: Installing the Motherboard
Install the I/O Shield:
Place the I/O shield in the back of the case, making sure it’s aligned correctly.
Mount the Motherboard:
Carefully place the motherboard into the case, aligning it with the standoffs.
Secure the motherboard with screws, ensuring it’s firmly in place.
Step 6: Connecting Components
Connect the PSU to the Motherboard:
Attach the 24-pin ATX power cable and the 8-pin CPU power cable.
Install and Connect Storage Drives:
Mount SSDs or HDDs in their respective bays.
Connect SATA cables from the drives to the motherboard and power cables from the PSU.
Install the GPU:
Insert the GPU into the PCIe slot and secure it with screws.
Connect the necessary power cables from the PSU to the GPU.
Step 7: Final Steps
Connect Front Panel Connectors:
Attach the case’s power button, reset button, USB ports, and audio jacks to the motherboard.
Cable Management:
Use cable ties to organize and secure cables for better airflow and aesthetics.
Final Check:
Ensure all components are securely connected and nothing is loose.
Double-check power connections and ensure the CPU cooler is properly seated.
Step 8: Powering On and Installing the OS
Initial Boot:
Connect your monitor, keyboard, and mouse.
Power on the PC and enter the BIOS by pressing the designated key (usually DEL or F2).
BIOS Setup:
Ensure all components are recognized.
Set the boot priority to your installation media (USB drive or DVD).
Installing the Operating System:
Insert your OS installation media and follow the on-screen instructions to install Windows, Linux, or another OS.
Install necessary drivers for your motherboard, GPU, and other components.
Conclusion
Building your first PC is a satisfying project that offers both practical skills and a deeper appreciation for how computers work. By following this guide, you’ll have a personalized machine tailored to your needs. If you need assistance or run into any issues, don’t hesitate to reach out to On-Site Louisville Computer Repair Co. for professional PC building help. Happy building!
[socialring]

RSS Feed
