Problem: IBUYPOWER prebuilt Gaming PC would not power on. Cause: CMOS/BIOS issue. Fix: Reset CMOS and update the BIOS. Result: PC powered on and booted normally.
PC Won’t Turn On
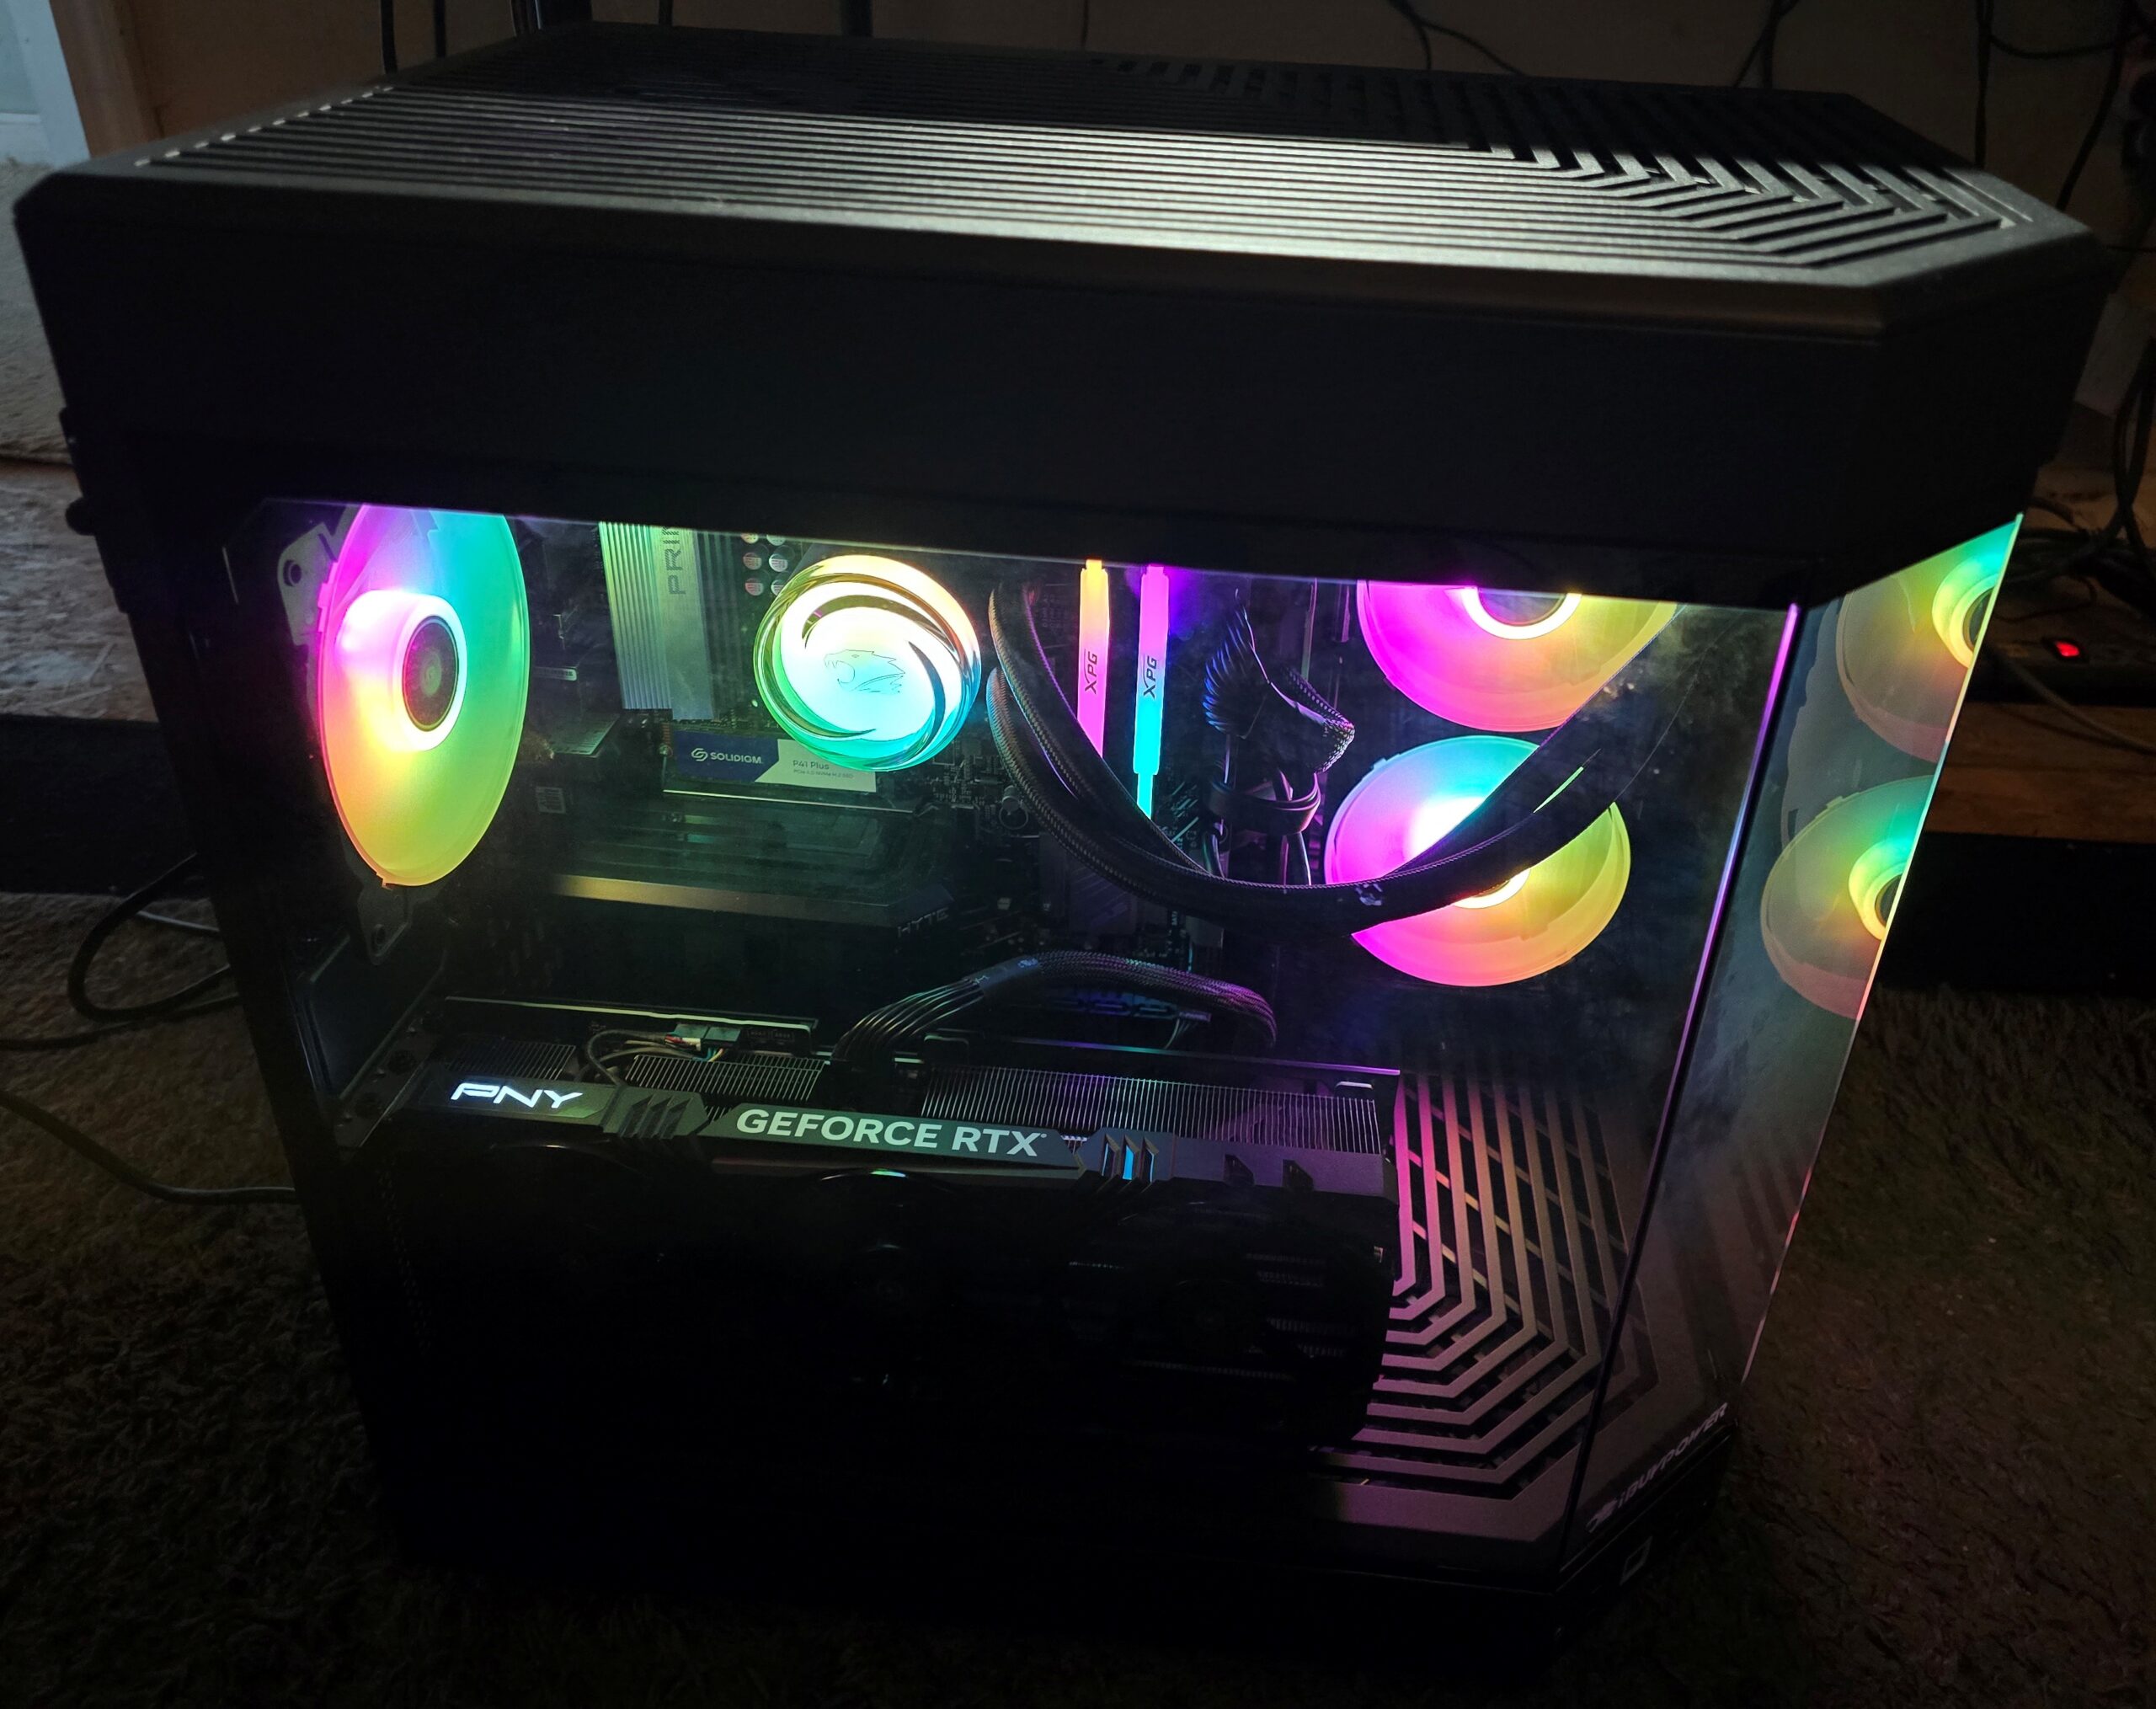
I recently worked on an IBUYPOWER Windows 11 gaming computer that initially appeared with no activity: no lights, fans, or anything. Pressing the case’s power button wouldn’t start the computer. This was a fairly powerful prebuilt IBUYPOWER PC that had an ASUS PRIME B650M-A AX II motherboard with an AMD Ryzen 9 7900X 12-core processor, 32GB of DDR5 memory and a 2TB Solidigm NVMe SSD. Once the computer Clear CMOS/RTC pins where jumpered per ASUS instructions on the ASUS website it came on. I was suspicious it needed a BIOS update (or a PSU).
Finding a Very Old BIOS
The computer was running, I entered the ASUS BIOS and found that the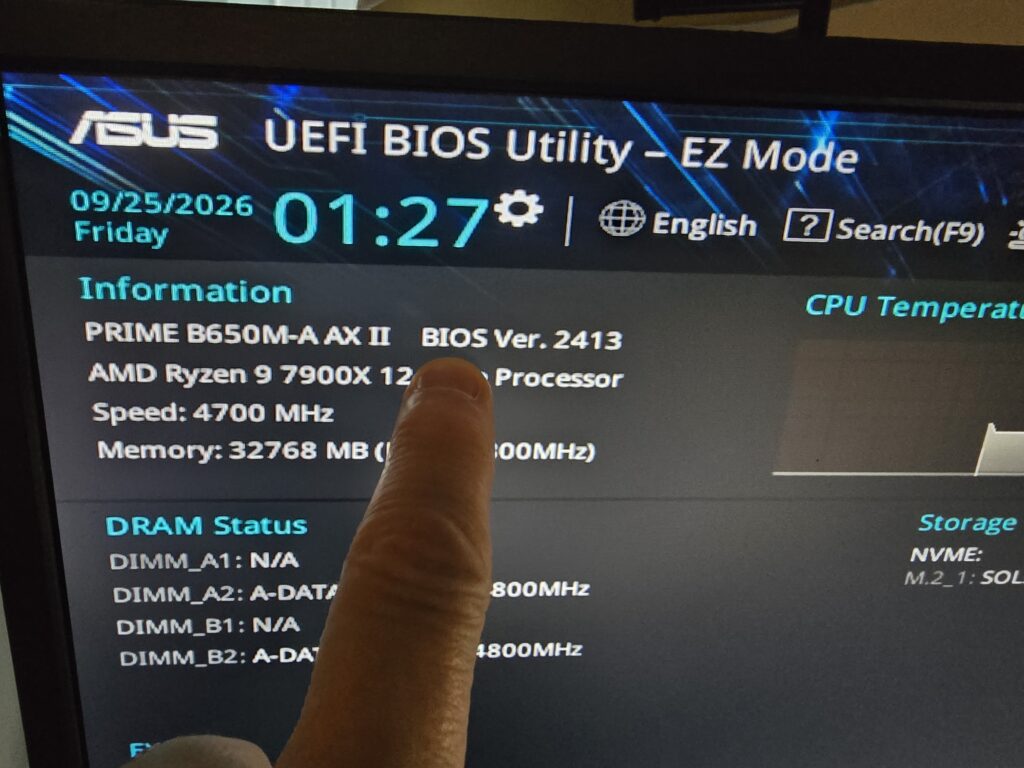 PRIME B650M-A AX II was running BIOS version 2413, dated February 2, 2024.The system correctly detected the Ryzen 9 7900X, 32GB of DDR5 memory and its 2TB Solidigm NVMe SSD.I checked the available BIOS versions for this exact motherboard and found BIOS version 3881, dated June 17, 2026.
That represented more than two years of BIOS revisions. On a modern AMD AM5 platform, BIOS updates can include changes involving compatibility, memory support, stability, security and AMD AGESA firmware.
With the computer now operational enough to work on, bringing the motherboard firmware up to date made sense.
Getting the Correct BIOS
Motherboard model numbers are especially important when updating firmware.
This motherboard was specifically an ASUS PRIME B650M-A AX II. ASUS makes several B650 motherboards with similar names, so I verified the exact model before downloading anything.
Get the newest version of BIOS you can get that is non-BETA. See the photo inserted for a visual of this. I downloaded BIOS 3881. There was also a BETA version that was newer but I don’t want to do a BETA version of BIOS so I used the last Non-BETA version and extracted the ZIP file to a USB flash drive formatted in Fat32. Inside was the BIOS .CAP file, ASUS BIOSRenamer utility and a configuration file.
The BIOS file was:
You can ignore any other extraced files from the BIOS update you download from ASUS. The “cap” file is the only one you need. I copied it to the USB flash drive.
When the USB Drive Didn’t Show Up
I restarted the computer, entered the ASUS UEFI BIOS, switched to Advanced Mode and opened:
Tool → ASUS EZ Flash 3 Utility
Initially, the USB flash drive wasn’t appearing as expected.
It would have been easy to start troubleshooting the flash drive format, BIOS download or file itself. The actual problem was much simpler.
I hadn’t pushed the USB flash drive completely into the USB port.
Once I fully seated the drive, ASUS EZ Flash detected it and displayed the BIOS file normally.
It’s a good reminder that even when working on a complicated computer problem, it’s worth checking the simple things first.
Checking BitLocker and Loading Default BIOS Settings
Before updating the BIOS, ASUS warned me to back up the BitLocker recovery key and suspend encryption because BIOS or TPM changes can sometimes trigger a BitLocker recovery prompt. Instead of ignoring the warning, I rebooted into Windows and confirmed BitLocker was not enabled. ASUS also recommended loading the motherboard’s optimized defaults before updating, so I did that and returned to EZ Flash 3. I proceeded with the update.
Updating the BIOS
Once the BIOS update started, I left the machine alone.
Interrupting power while motherboard firmware is actually being written can potentially leave a computer unable to boot, so this isn’t the time to shut it down or start pressing buttons.
ASUS EZ Flash completed the update and restarted the computer.
On the next startup, the American Megatrends POST screen displayed:
The update had succeeded.
First Boot After the Update
The POST screen also showed that the motherboard correctly detected the AMD Ryzen 9 7900X, 32GB of DDR5 memory and the Solidigm NVMe SSD.
Because the BIOS settings had been reset, the computer instructed me to press F1 and enter Setup.
I entered the BIOS again and verified that BIOS 3881 was installed, the processor and memory were detected, the NVMe SSD was present and Windows Boot Manager was still listed as the boot device.
Everything looked correct, so I saved the settings and exited.
Windows 11 Loaded Normally
The computer restarted and booted directly into Windows 11.
There was no BitLocker recovery prompt, no missing boot device and no problem getting Windows to load.
At this point I had taken a gaming PC that wouldn’t initially power on from its case controls, manually started it by jumpering the motherboard’s BIOS reset PINS and discovered that its motherboard firmware was more than two years out of date and successfully updated it from BIOS 2413 to BIOS 3881.
I recently worked on an IBUYPOWER Windows 11 gaming computer that initially appeared with no activity: no lights, fans, or anything. Pressing the case’s power button wouldn’t start the computer. This was a fairly powerful prebuilt IBUYPOWER PC that had an ASUS PRIME B650M-A AX II motherboard with an AMD Ryzen 9 7900X 12-core processor, 32GB of DDR5 memory and a 2TB Solidigm NVMe SSD. Once the computer Clear CMOS/RTC pins where jumpered per ASUS instructions on the ASUS website it came on. I was suspicious it needed a BIOS update (or a PSU).
Finding a Very Old BIOS
The computer was running, I entered the ASUS BIOS and found that the
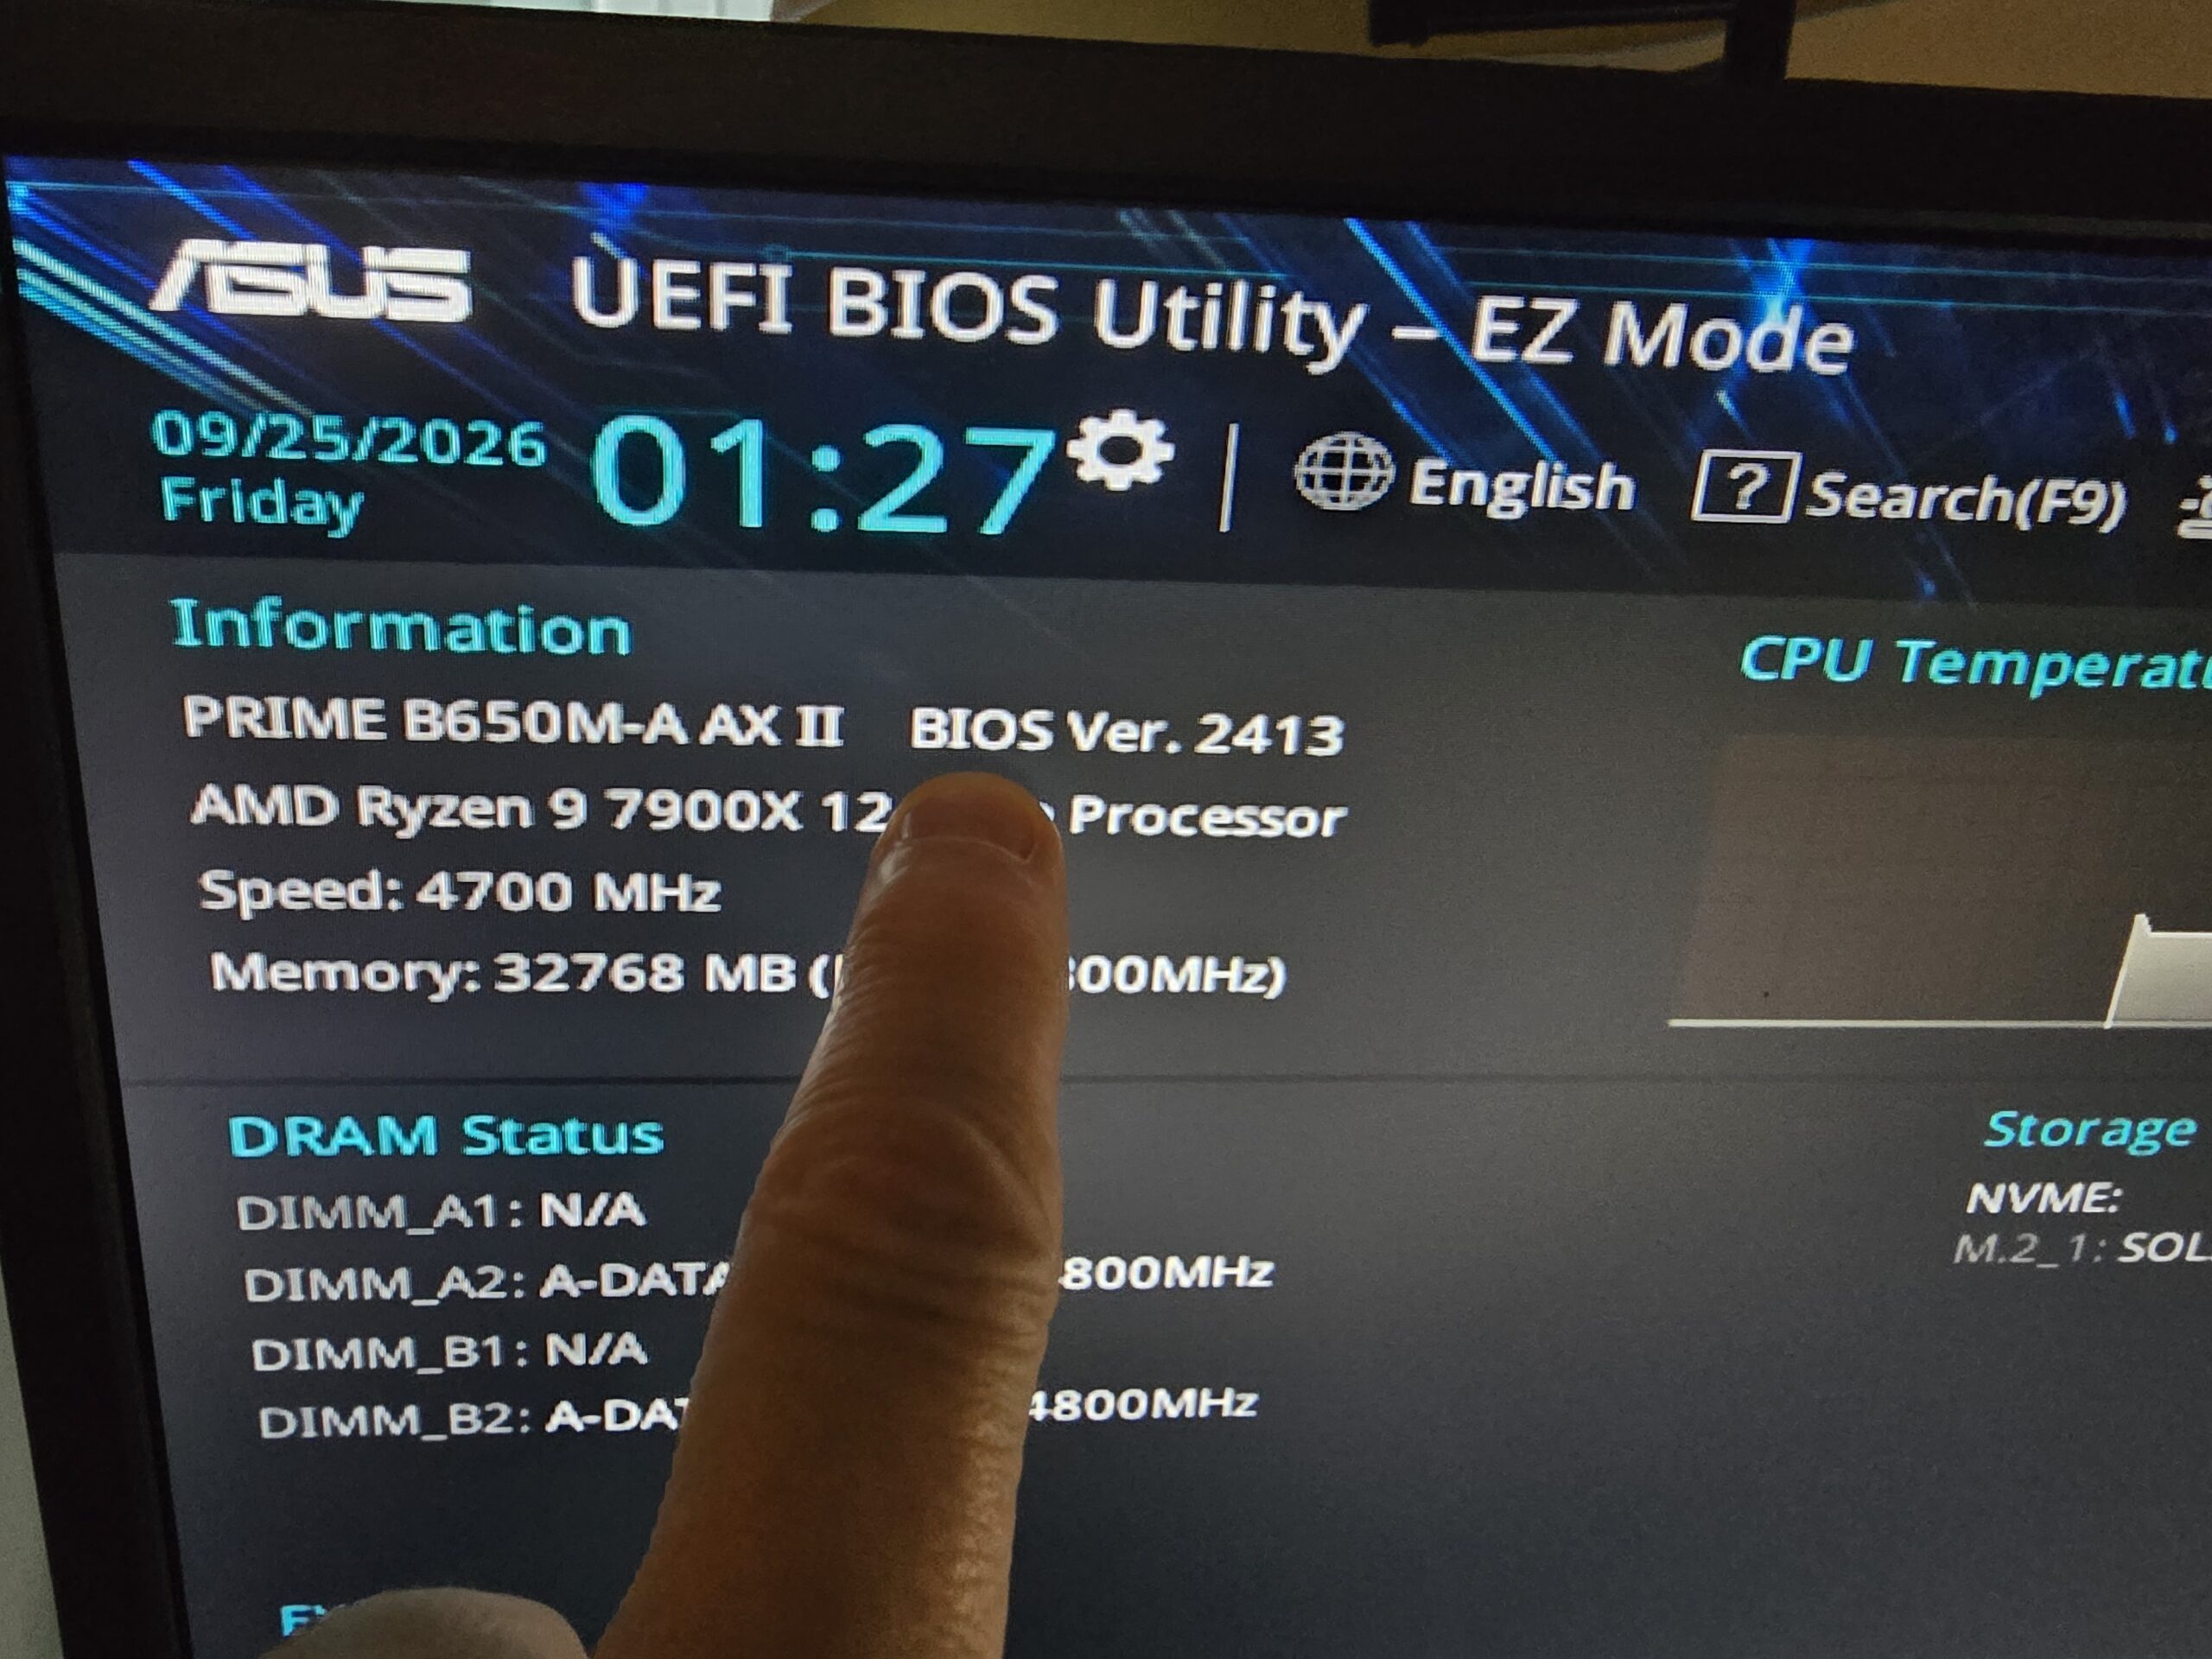 PRIME B650M-A AX II was running BIOS version 2413, dated February 2, 2024.The system correctly detected the Ryzen 9 7900X, 32GB of DDR5 memory and its 2TB Solidigm NVMe SSD.I checked the available BIOS versions for this exact motherboard and found BIOS version 3881, dated June 17, 2026.
That represented more than two years of BIOS revisions. On a modern AMD AM5 platform, BIOS updates can include changes involving compatibility, memory support, stability, security and AMD AGESA firmware.
With the computer now operational enough to work on, bringing the motherboard firmware up to date made sense.
Getting the Correct BIOS
Motherboard model numbers are especially important when updating firmware.
This motherboard was specifically an ASUS PRIME B650M-A AX II. ASUS makes several B650 motherboards with similar names, so I verified the exact model before downloading anything.
Get the newest version of BIOS you can get that is non-BETA. See the photo inserted
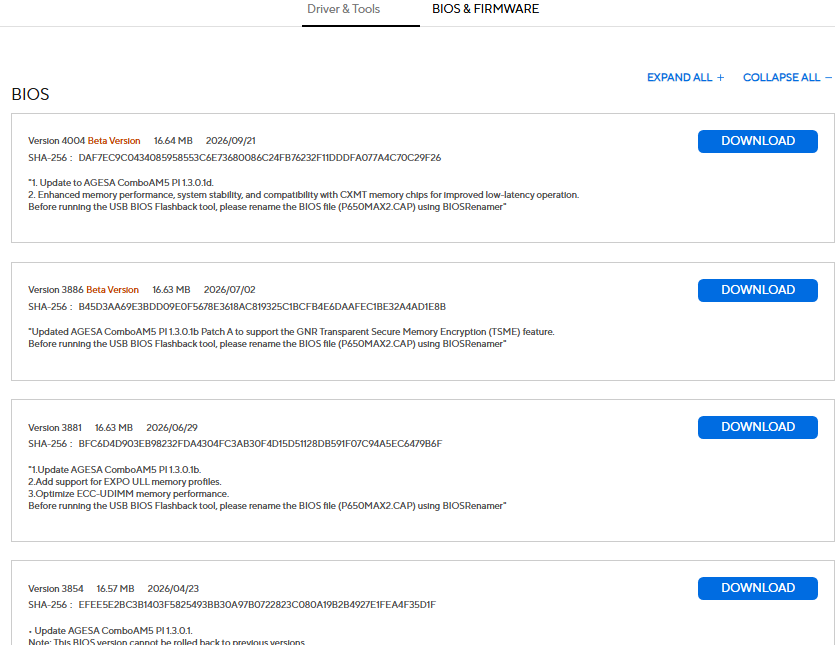 for a visual of this. I downloaded BIOS 3881. There was also a BETA version that was newer but I don’t want to do a BETA version of BIOS so I used the last Non-BETA version and extracted the ZIP file to a USB flash drive formatted in Fat32. Inside was the BIOS .CAP file, ASUS BIOSRenamer utility and a configuration file.
The BIOS file was:
PRIME-B650M-A-AX-II-ASUS-3881.CAPYou can ignore any other extraced files from the BIOS update you download from ASUS. The “cap” file is the only one you need. I copied it to the USB flash drive.
When the USB Drive Didn’t Show Up
I restarted the computer, entered the ASUS UEFI BIOS, switched to Advanced Mode and opened:
Tool → ASUS EZ Flash 3 Utility
Initially, the USB flash drive wasn’t appearing as expected.
It would have been easy to start troubleshooting the flash drive format, BIOS download or file itself. The actual problem was much simpler.
I hadn’t pushed the USB flash drive completely into the USB port.
Once I fully seated the drive, ASUS EZ Flash detected it and displayed the BIOS file normally.
It’s a good reminder that even when working on a complicated computer problem, it’s worth checking the simple things first.
Checking BitLocker and Loading Default BIOS Settings
Before updating the BIOS, ASUS warned me to back up the BitLocker recovery key and suspend encryption because BIOS or TPM changes can sometimes trigger a BitLocker recovery prompt. Instead of ignoring the warning, I rebooted into Windows and confirmed BitLocker was not enabled. ASUS also recommended loading the motherboard’s optimized defaults before updating, so I did that and returned to EZ Flash 3. I proceeded with the update.
Updating the BIOS
Once the BIOS update started, I left the machine alone.
Interrupting power while motherboard firmware is actually being written can potentially
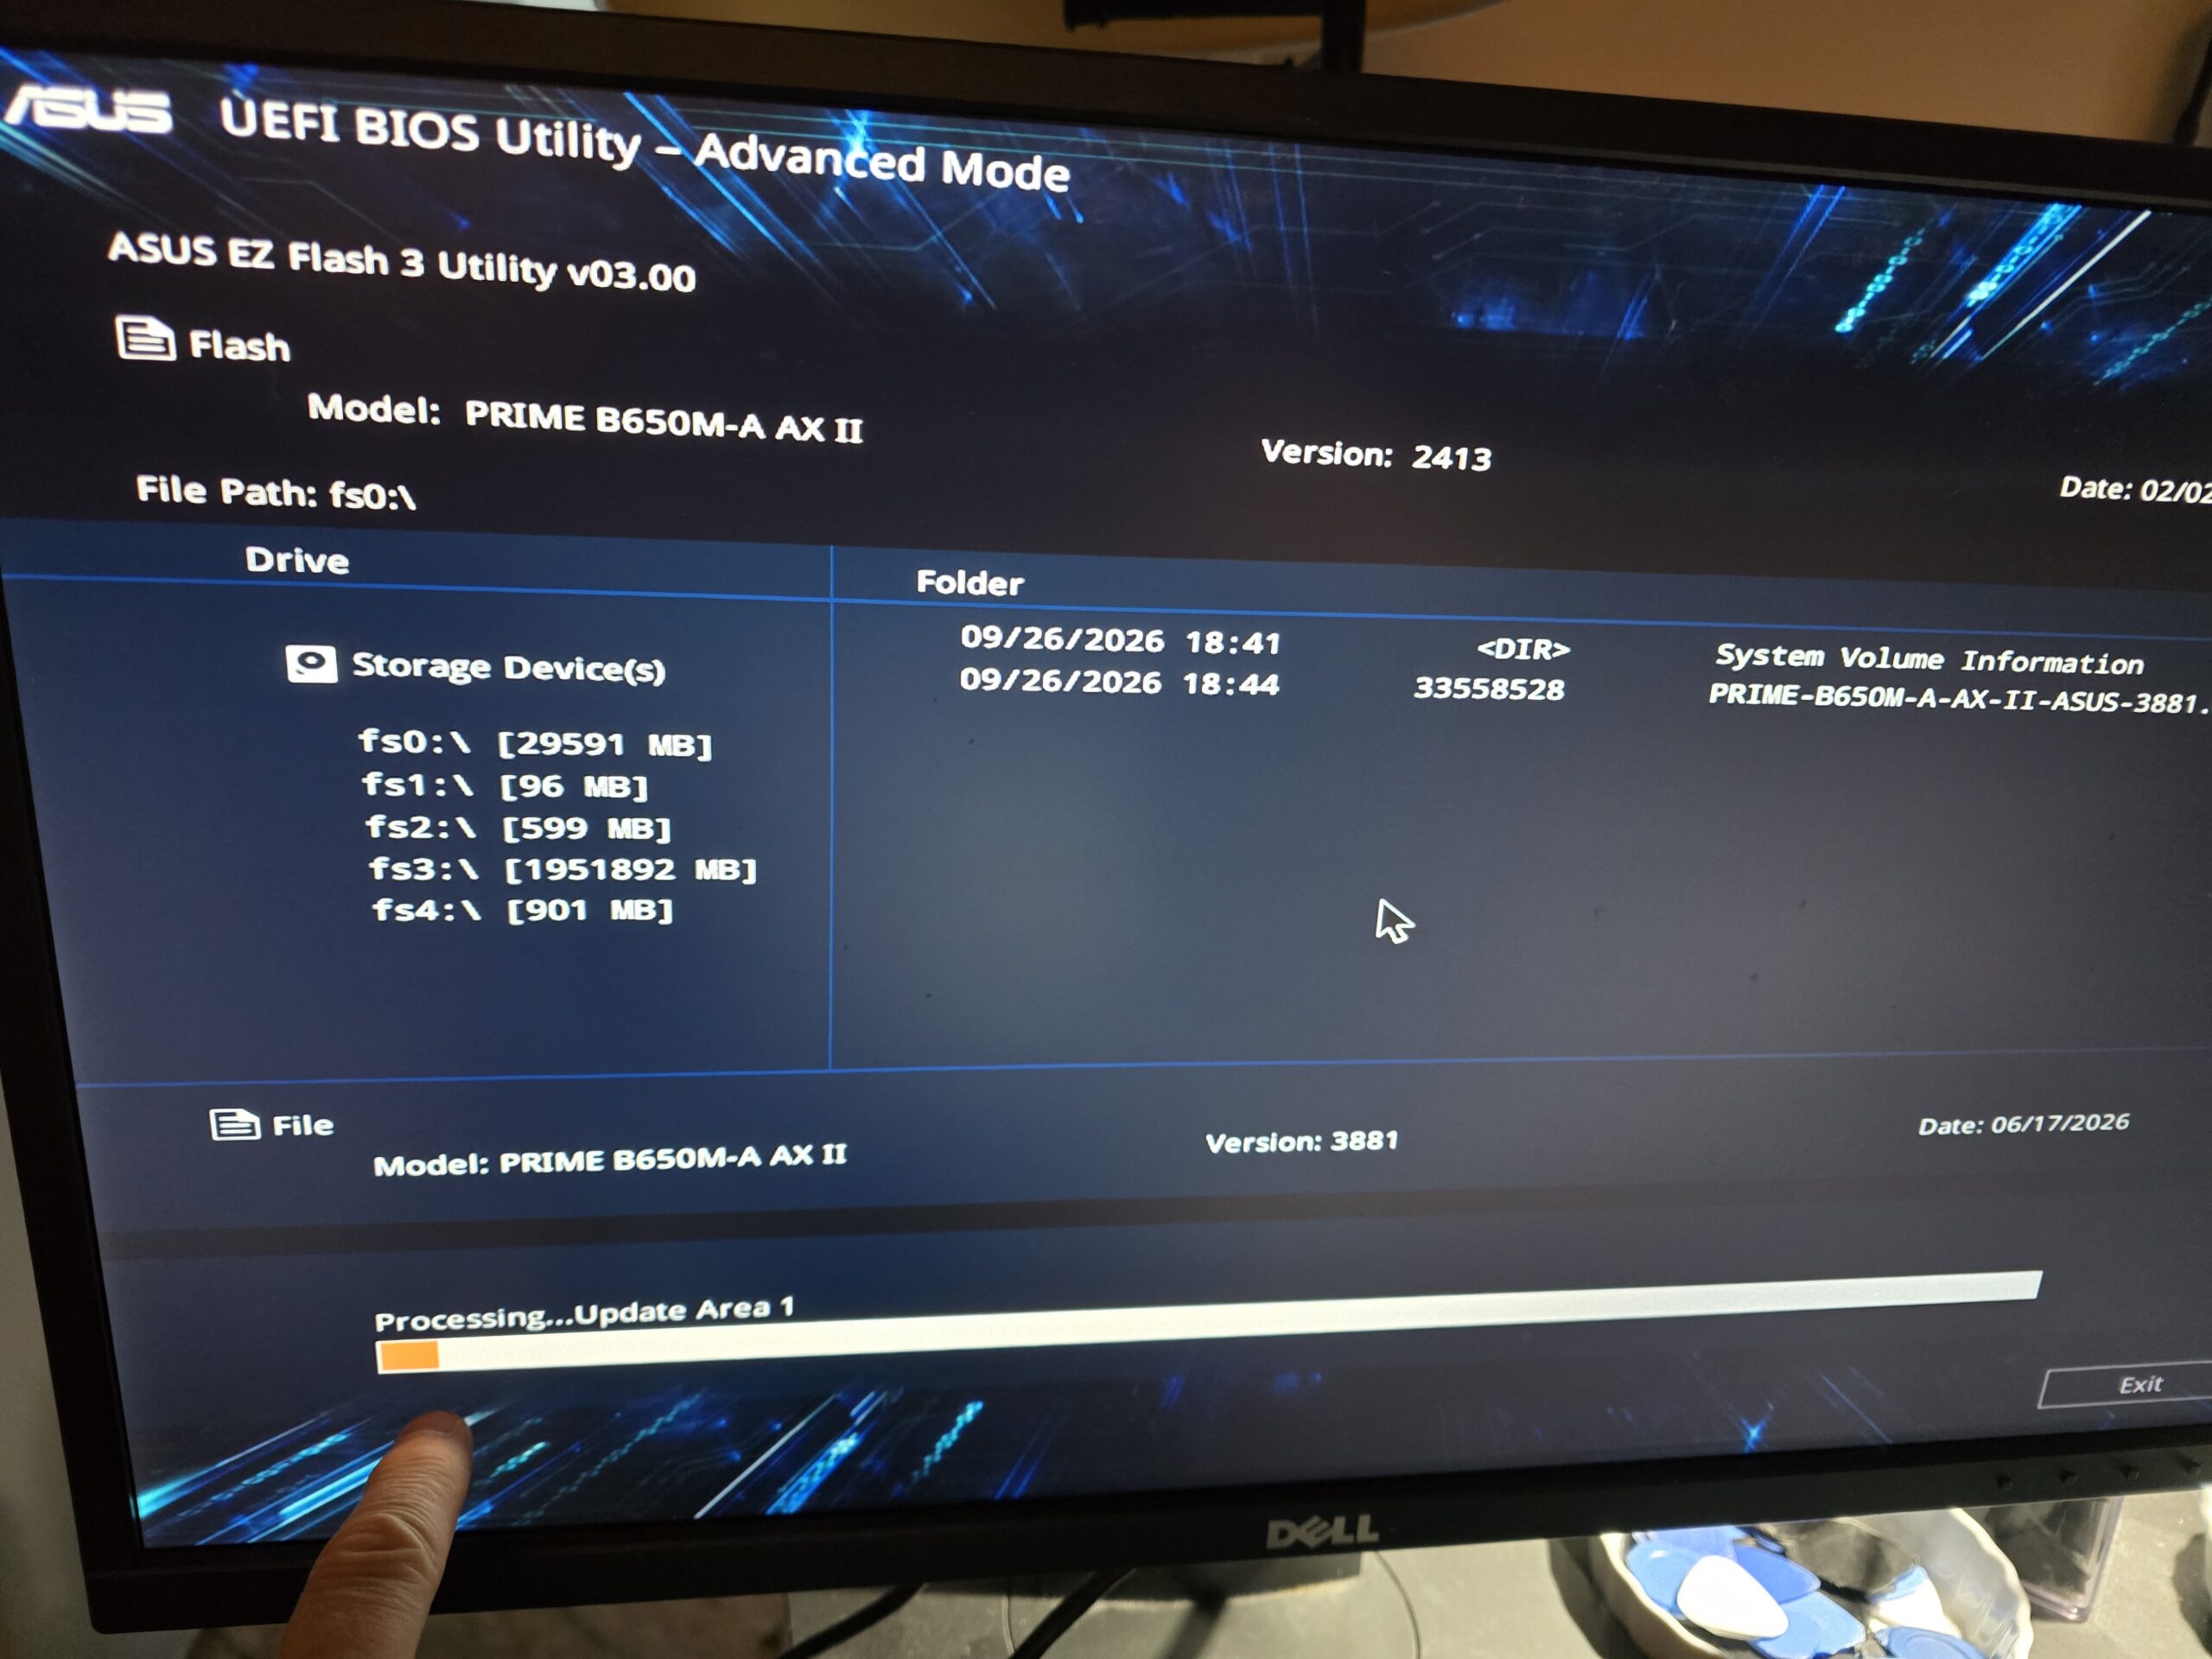 leave a computer unable to boot, so this isn’t the time to shut it down or start pressing buttons.
ASUS EZ Flash completed the update and restarted the computer.
On the next startup, the American Megatrends POST screen displayed:
ASUS PRIME B650M-A AX II ACPI BIOS Revision 3881The update had succeeded.
First Boot After the Update
The POST screen also showed that the motherboard correctly detected the AMD Ryzen 9 7900X, 32GB of DDR5 memory and the Solidigm NVMe SSD.
Because the BIOS settings had been reset, the computer instructed me to press F1 and enter Setup.
I entered the BIOS again and verified that BIOS 3881 was installed, the processor and memory were detected, the NVMe SSD was present and Windows Boot Manager was still listed as the boot device.
Everything looked correct, so I saved the settings and exited.
Windows 11 Loaded Normally
The computer restarted and booted directly into Windows 11.
There was no BitLocker recovery prompt, no missing boot device and no problem getting Windows to load.
At this point I had taken a gaming PC that wouldn’t initially power on from its case controls, manually started it by jumpering the motherboard’s BIOS reset PINS and discovered that its motherboard firmware was more than two years out of date and successfully updated it from BIOS 2413 to BIOS 3881.
Chris Calkins owns On-Site Louisville Computer Repair Co. in Louisville, Kentucky, and writes about the computer, networking and cybersecurity problems he encounters on real service calls.